GetResponse Autoresponder Tutorial
The GetResponse autoresponder is one of the best features of this email marketing tool.
Seriously.
Nothing is better than being able to automate the bulk of your emails…
Allowing you to save time and only focus on getting fresh leads into your funnel.
If that sounds like music to your ears?
Then you are going to love this post all about the amazing autoresponder feature.
How To Create A GetResponse Autoresponder

It’s no coincidence that this happens to be one of my absolute favorite features of GetResponse.
This is why I’m so excited to share this mini tutorial with you.
So whether you’re using GetResponse or you’re about to test it out?
You can always use this post to get help with a walkthrough.
That way you can follow along in the process.
Not onto the important steps.
Setting Up Your GetResponse Autoresponder
First, if you don’t have a list yet make sure you create one (it’s easy).
To create a GetResponse list:
- Click on Lists at the top of the main dashboard.
- Click on the blue button Create list to name your list.
That’s how easy it is to do (in case you haven’t done it yet or will need to).
Now you’ll want to make a few more clicks of your mouse.
Look at the top left of your main dashboard page where it says Menu.
- Click on Menu.
- A drop-down will appear and you’ll want to click on the Autoresponder text.
Here is a picture so that you can see exactly what it looks like:
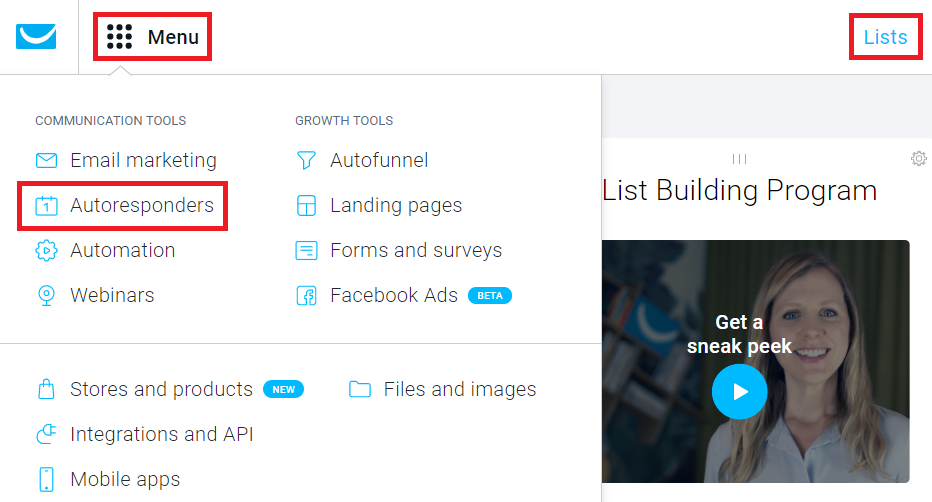
Note: I also put a box around where you can find the Lists link at the top of the screen.
Keep in mind that the GetResponse dashboard and pages can change in look…
So make sure that you use this picture (and the others) as a simple check-point.
The next part is easy:
- Click on the big blue button that says Create autoresponder.
Here is another picture of what that page looks like for me.
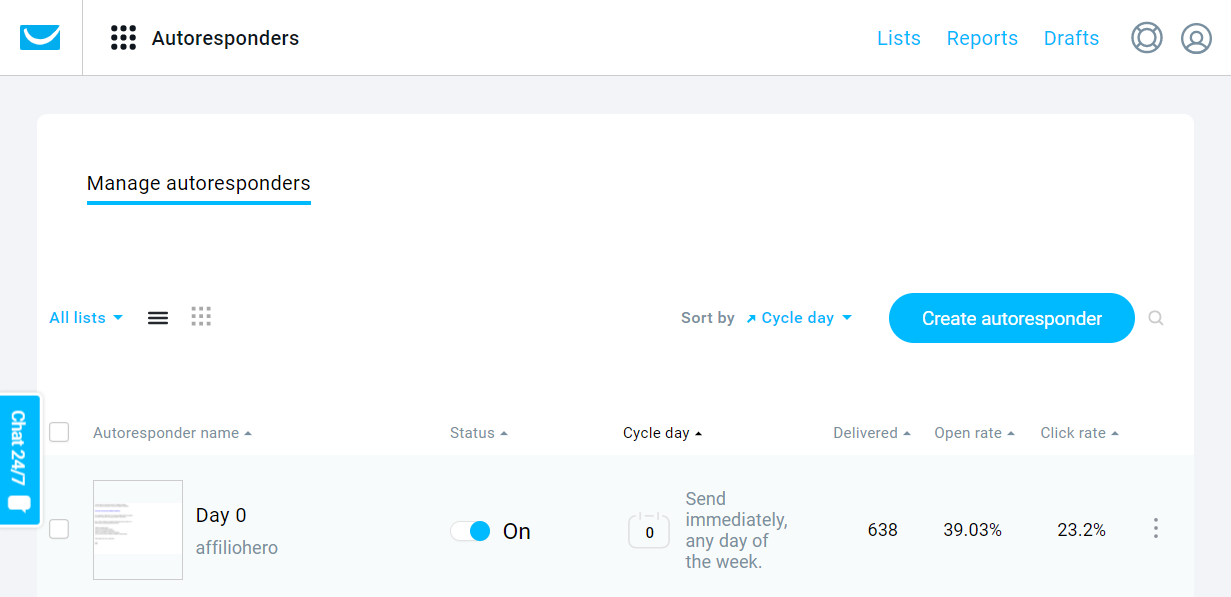
I already have an autoresponder set up so you might not currently have any days under it.
Remember to click on the big blue button on the right side of the page.
Next up.
Creating Your GetResponse Autoresponder
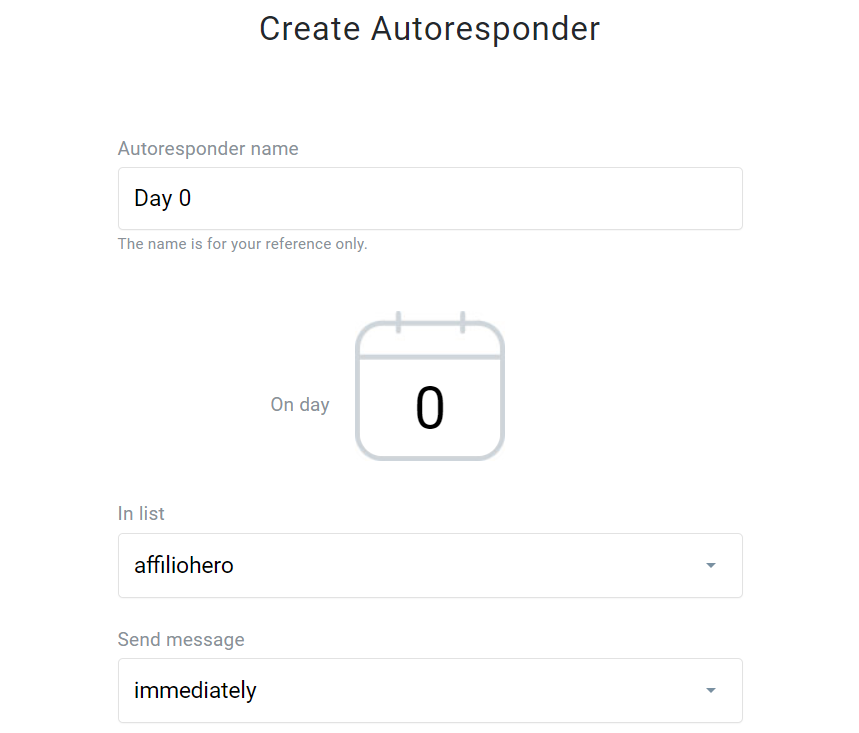
Now we come to the fun part where you will be able to add your very own emails.
If you look at the image above, you are going to need to enter in a few details.
Allow me to walk you through this section as well:
- Autoresponder name: this is only for your reference.
- On day: when emails go out (set to 0 for your first email).
- In list: your main list that you want your emails getting sent to.
- Send message: I prefer keeping this set to immediately for the first email.
A little bit more information when it comes to the Send message section.
The first day I set to immediately.
Every other following email I set it to the same time signed up.
This allows your subscribers to get emails at the same time that they signed up.
Given the fact that there were awake at the time?
This means that they will probably be awake when they get sent in the future at the same time.
Alright, back to the rest of the settings now (which you can’t see in the picture above).
- Enable on: I also prefer checking all of the boxes so there are no further delays.
And below that we have:
- Choose the message (or).
- Create a new email.
Click on Create a new email and you’ll get taken to a screen that looks like the image below:

Let’s take a quick walkthrough of this section as well:
- Message name: for your reference (only you will see this).
- Subject line: this is an important one so let’s focus a little more on this.
Your Subject Line
Your emails all start with your subject line.
If no one opens your email then you certainly aren’t getting any clicks or sales.
Just make sure that you put some time into coming with a subject line that grabs attention.
So when it comes to your first email followup?
I do have to say that these are the easiest subject lines to come up with because:
- Your subscribers are expecting it.
- They are usually looking for their download.
That’s why I used the above subject line as an example which says:
Click Here To Access Your Video Training
It includes a call to action along with what they had previously requested.
Don’t forget that you can use emojis in GetResponse to help get more opens as well.
Now back to the tutorial.
Choosing Your GetResponse Template
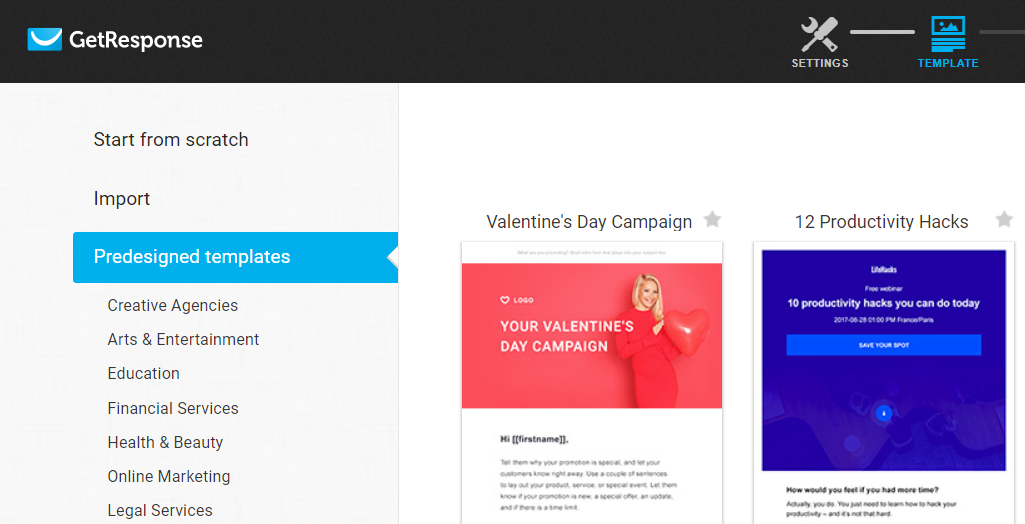
There are quite a few templates to choose from, but for me?
I always start from scratch (as I’m most interested in keeping things simple).
Here are the steps that I take when it comes to choosing a blank template:
- Click on Start from scratch.
- Scroll down and click on Blank template.
That will allow you to get a perfectly-clean template with no pictures whatsoever.
Now onto the last part when it comes to this email marketing tutorial (well, almost the last part).
Editing Your Autoresponder Email
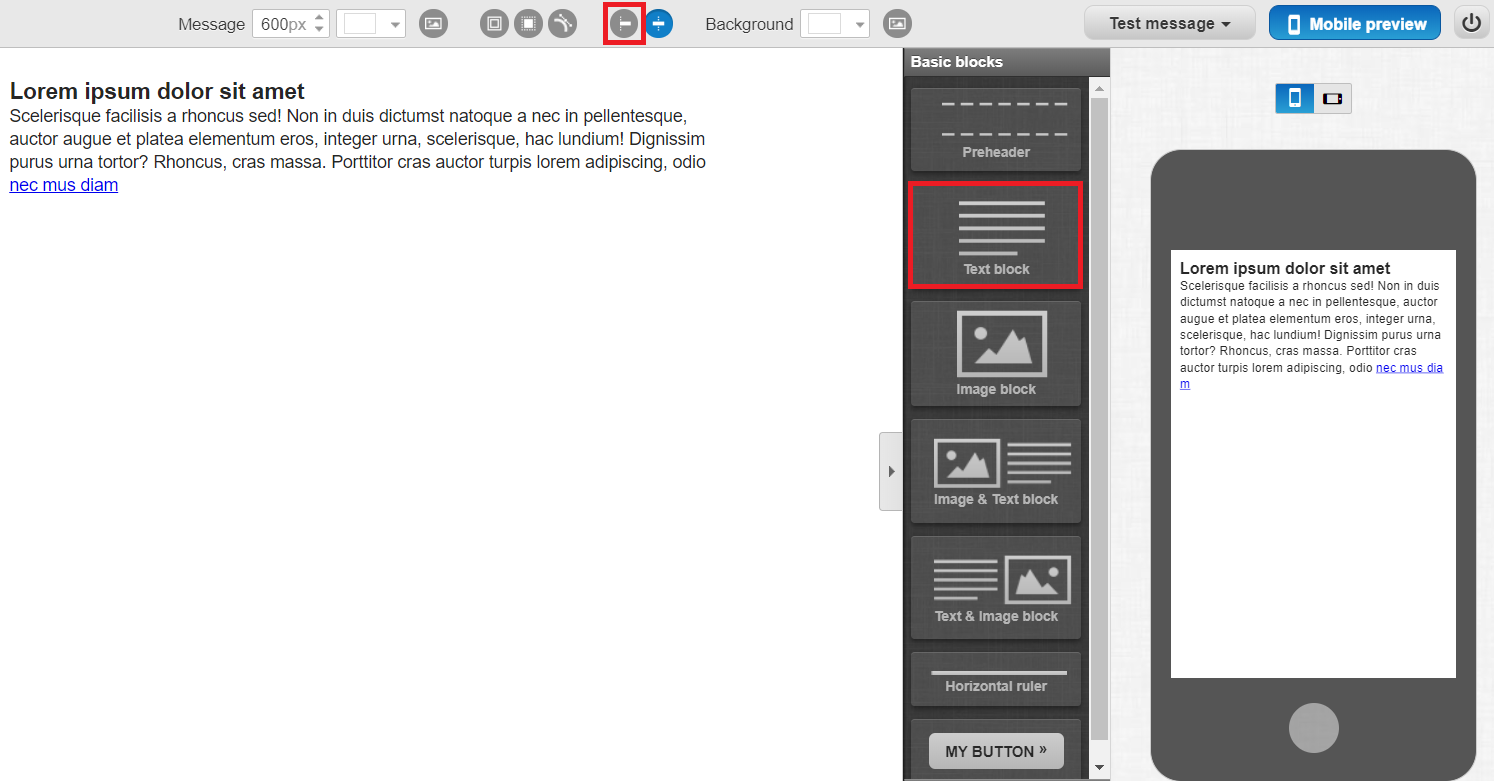
So there are two things that you’re first going to want to do:
- Double click the Text block tab (outlined in red).
- Click on the circle picture at the top of the screen (also outlined in red).
The text box allows you to start writing your email (just remove the unnecessary Lorem stuff).
The circle picture allows you to move your email to the left side of the screen…
And in my opinion?
It looks so much better as opposed to being centered when it hits the inbox.
Now, this is going to be the part where you add in your awesome first email.
I’ll leave that up to you since I’m simply showing you how to set up the process…
But if you’d like more information about that, feel free to leave a comment down below.
Anyway.
Once you are done writing your email simply click on Next step at the bottom right of the screen.
You will then get taken back to the Create Autoresponder page (shown below):
Here are the last steps:
- Scroll down to the bottom of this page.
- Click on the Save and publish button (it should be blue).
And just like that?
You have successfully created the very first email in your GetResponse autoresponder.
Pretty simple right?
To add more emails, simply repeat the process and you will need to change a few things:
- The date when it goes out (I prefer every 2 days so day 0, then 2, then 4, etc).
- The email along with the subject line (obviously).
So with all of that being said, let’s wrap up this post.
Final Helpful Words
As I stated at the beginning of this post…
The GetResponse autoresponder feature is one of my favorite parts of using this software.
It’s one of the biggest reasons why I like it compared to many email marketing autoresponders.
I highly recommend it as it will allow you to save a ton of time and effort.
Plus, don’t forget about the extra ability to start making sales too.
So if you haven’t started testing it out yet?
You can click the big picture down below to get started using GetResponse for free:

I want to say thank you for taking the time to read this blog post…
And I certainly hope that it helped you out.
I’ll leave you with a few related posts in case you need some more information:
- Related GetResponse Article: How much does GetResponse cost?
- Related GetResponse Article: Going against ConvertKit.
Have an awesome day!
